
I’m going to start this article by invoking a little bit of anxiety: You’ve likely updated a theme, plugin or piece of code in your theme (such as functions.php) and you’re either locked out of the backend, or staring at a blank white screen. Perhaps everything is in a state of 404, or error 500, but there’s no worries here, because Wedū Media is about to show you how to debug what has gone wrong so you can diagnose and fix this issue!
The good news? Most WordPress issues follow predictable patterns, and with the right debugging approach, you can identify and fix them faster than you might think. Whether you’re a business owner managing your own site, a freelancer supporting clients, or a hobbyist learning the ropes, this guide will walk you through the complete debugging process.
Hold on: What Is WordPress Debugging?
Debugging is the process of identifying, isolating, and fixing errors in your WordPress site. Think of it like detective work: you’re gathering clues, testing theories, and systematically eliminating possibilities until you find the culprit.
Why this matters for your business:
- Downtime costs money: Every minute your site is broken, you’re losing visitors, leads, and sales.
- Poor performance hurts SEO: Google penalizes slow or error-prone sites in search rankings.
- User experience impacts conversions: Broken features or display issues drive potential customers away.
- Prevention beats panic: Understanding debugging helps you prevent problems before they happen.
The sooner you can identify and fix issues, the less impact they have on your bottom line. So let’s stop wasting time and get into it!
The Most Common WordPress Errors (And What They Mean)
Before we dive into debugging techniques, let’s identify what you’re likely to encounter:
The White Screen of Death (WSOD)
Your site displays a completely blank white page with no error message. This is typically caused by PHP errors, memory limit issues, or plugin conflicts that crash before WordPress can display anything.
Internal Server Error (500 Error)
You see “500 Internal Server Error” or similar messages. This is your server’s way of saying “something went wrong, but I can’t tell you what.” Usually caused by corrupted .htaccess files, PHP memory limits, or plugin conflicts.
Error Establishing Database Connection
WordPress can’t connect to your MySQL database. This could mean database credentials are wrong, your database server is down, or your database is corrupted.
404 Errors on Everything
All your pages and posts return “404 Not Found” errors. This typically points to corrupted permalink settings or .htaccess file issues.
Mixed Content Warnings
You see warnings about “insecure content” or broken padlock icons. This happens when your site loads HTTP resources on an HTTPS page.
Plugin or Theme Conflicts
Specific features stop working after updates, or you see PHP warnings and notices throughout your site.
Slow Performance or Timeouts
Pages take forever to load or time out completely. This can be caused by unoptimized databases, poorly coded plugins, inadequate hosting resources, or server configuration issues.
Essential Tools for WordPress Debugging
Before you start troubleshooting, set up these essential tools:
WordPress Debug Mode
WordPress has built-in debugging features that are turned off by default. Enabling them reveals the error messages you need to diagnose problems.
To enable debug mode:
- Access your site via FTP or cPanel File Manager
- Locate your
wp-config.phpfile in the root directory - Find the line that says
define('WP_DEBUG', false); - Replace it with these lines:
define(‘WP_DEBUG’, true);
define(‘WP_DEBUG_LOG’, true);
define(‘WP_DEBUG_DISPLAY’, false);
define(‘SCRIPT_DEBUG’, true);
What these do:
WP_DEBUGenables WordPress debugging modeWP_DEBUG_LOGsaves errors to a log file at/wp-content/debug.logWP_DEBUG_DISPLAYprevents errors from showing on your live siteSCRIPT_DEBUGforces WordPress to use non-minified versions of scripts (easier to debug)
Important: Never leave WP_DEBUG_DISPLAY set to true on a live site. It exposes sensitive information about your server paths and configuration.
Query Monitor Plugin

Query Monitor is the Swiss Army knife of WordPress debugging. It shows you:
- Database queries and their execution time
- PHP errors, warnings, and notices
- HTTP API calls
- Scripts and stylesheets being loaded
- Theme template files in use
- Admin screen hooks
Install it from the WordPress plugin directory and activate it. You’ll see a new admin toolbar menu with detailed debugging information.
Browser Developer Tools
Modern browsers (Chrome, Firefox, Safari, Edge) have built-in developer tools that are essential for debugging:
- Console: Shows JavaScript errors and warnings
- Network tab: Displays all resources loading (or failing to load)
- Elements/Inspector: Lets you examine and modify HTML/CSS in real-time
Access them by pressing F12 (Windows) or Cmd+Option+I (Mac).
Health Check Plugin
The official Health Check & Troubleshooting plugin lets you test your site in a clean environment without affecting normal visitors. It can temporarily disable all plugins and switch to a default theme just for your browsing session.
This is incredibly useful for isolating conflicts without taking your site offline.
The Systematic WordPress Debugging Process
Here’s the step-by-step approach professional developers use to debug any WordPress issue:
Step 1: Document the Problem
Before touching anything, document exactly what’s happening:
- What error message are you seeing (screenshot it)?
- When did it start?
- What changed recently (updates, new plugins, configuration changes)?
- Does it happen on all pages or specific ones?
- Does it happen for all users or just admins?
- What browser/device are you using?
This documentation helps you track patterns and prevents you from forgetting important details as you troubleshoot.
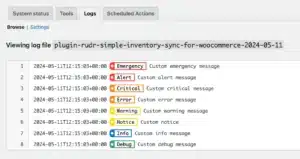
Step 2: Check Your Error Logs
Enable WP_DEBUG if you haven’t already, then check these locations:
WordPress Debug Log: /wp-content/debug.log
This file logs PHP errors, warnings, and notices. Look for the most recent entries and pay special attention to:
- Fatal errors (these crash your site)
- Deprecated function warnings (these indicate outdated code)
- Notices about undefined variables or arrays
Server Error Logs: Your hosting control panel usually provides access to server error logs. Check:
- Apache error log
- PHP error log
- MySQL error log
These often contain information that WordPress debug logs miss, especially for server-level issues.
Step 3: Test for Plugin Conflicts
Plugin conflicts are the #1 cause of WordPress issues. Here’s how to test systematically:
Method 1: Deactivate All Plugins
- Go to Plugins → Installed Plugins
- Select all plugins using the checkbox at the top
- Choose “Deactivate” from the Bulk Actions dropdown
- Click Apply
If the problem disappears, you know a plugin is the culprit. Now reactivate them one by one, testing after each, until the problem returns. The last plugin you activated is your troublemaker.
Method 2: Use Health Check Plugin (Safer for Live Sites)
- Install and activate Health Check & Troubleshooting
- Go to Tools → Site Health → Troubleshooting
- Click “Enable Troubleshooting Mode”
This disables all plugins and switches to a default theme ONLY for you. Your visitors see the normal site. You can then selectively enable plugins to identify the conflict.
Step 4: Test Your Theme
After ruling out plugins, your theme might be the problem:
- Switch to a default WordPress theme (Twenty Twenty-Four)
- Check if the issue persists
If the problem disappears, your theme is causing it. This could be:
- Outdated theme code
- Conflicts with recent WordPress updates
- Custom code errors in functions.php
- Template file issues
Contact your theme developer or hire a developer to fix theme-specific issues.
Step 5: Check File Permissions
Incorrect file permissions can cause various errors. WordPress requires specific permissions:
Recommended permissions:
- Directories:
755or750 - Files:
644or640 wp-config.php:440or400(most secure)
You can check and modify permissions via FTP, cPanel File Manager, or SSH.
Step 6: Increase PHP Memory Limit
Many WordPress errors are caused by hitting PHP memory limits. To increase your limit:
Edit wp-config.php:
Add this line before “That’s all, stop editing!”:
define(‘WP_MEMORY_LIMIT’, ‘256M’);
“`
**Or edit .htaccess:**
“`
php_value memory_limit 256M
“`
**Or edit php.ini:**
“`
memory_limit = 256M
If you can’t access these files or don’t know how to edit them safely, contact your hosting provider to increase the limit for you.
Step 7: Regenerate .htaccess and Permalinks
Corrupted .htaccess files or permalink settings cause routing issues:
- Go to Settings → Permalinks in your WordPress dashboard
- Don’t change anything—just click “Save Changes”
- This regenerates your .htaccess file and flushes rewrite rules
If that doesn’t work:
- Via FTP, rename your
.htaccessfile to.htaccess_old - Create a new, blank
.htaccessfile - Go to Settings → Permalinks and click Save Changes
- WordPress will populate the file with correct rules
Step 8: Repair and Optimize Your Database
Database corruption can cause various strange behaviors:
Quick repair via wp-config.php:
Add this line to wp-config.php:
define('WP_ALLOW_REPAIR', true);Then visit: yoursite.com/wp-admin/maint/repair.php
Choose “Repair and Optimize Database”
Important: Remove that line from wp-config.php immediately after repair. Leaving it active is a security risk.
Alternative: Use phpMyAdmin
If you have cPanel access:
- Open phpMyAdmin
- Select your WordPress database
- Check all tables
- Choose “Repair table” from the dropdown
Step 9: Check for Malware or Hacked Files
If you’re seeing unexpected behavior, random redirects, or performance issues, you might be dealing with malware:
Use a security plugin:
- Wordfence Security (includes malware scanner)
- Sucuri Security
- MalCare
These plugins scan your WordPress files and database for known malware signatures and suspicious code.
Check your core files:
Via FTP or SSH, download and compare checksums of WordPress core files against official WordPress.org versions. Any differences indicate modified files.
Step 10: Review Recent Changes
Think back to what changed before the problem started:
- Did you update WordPress core, plugins, or themes?
- Did you install anything new?
- Did your host make server changes?
- Did you modify any code or configuration files?
Often, the fix is simply reverting the most recent change. Keep backups so you can roll back when needed.
Builder-Specific Debugging: When You Need Specialized Knowledge
The debugging process above works for any WordPress site, but if you’re using a page builder, you’ll encounter builder-specific issues that require specialized knowledge.
Debugging Elementor Sites
Elementor is the most popular page builder, but it introduces its own layer of complexity. Common Elementor-specific issues include:
- Widget rendering problems
- CSS/JS not loading properly
- Performance issues with too many widgets
- Conflicts with theme CSS
- Database bloat from revision storage
Read our complete guide: How to Debug Elementor Sites →
Debugging Gutenberg/Block Editor
WordPress’s native Block Editor has its own quirks and debugging requirements:
- Block validation errors
- Custom blocks not registering
- Block patterns not displaying
- Editor loading issues
- JSON block markup problems
Read our complete guide: How to Debug Gutenberg Block Editor Issues →
Debugging Divi Sites
Divi’s visual builder architecture creates unique debugging challenges:
- Builder interface not loading
- Front-end builder display issues
- Divi shortcode problems
- Theme Builder conflicts
- Cache-related display problems
Read our complete guide: How to Debug Divi Builder Sites →
Debugging Beaver Builder
Beaver Builder sites require specific debugging approaches:
- Module rendering issues
- Template cache problems
- Custom module errors
- Themer integration conflicts
- AJAX save failures
Read our complete guide: How to Debug Beaver Builder Sites →
Preventive Debugging: Stop Problems Before They Start
The best debugging strategy is prevention. Here’s how to minimize future issues:
Keep Everything Updated
Run updates regularly, but strategically:
- Always backup first (use UpdraftPlus, BackupBuddy, or your host’s backup system)
- Update in this order: WordPress core → plugins → theme
- Test thoroughly after each update
- Keep a staging site for testing updates before applying them to production
Use Quality Plugins and Themes
Not all WordPress products are created equal:
- Stick to plugins from reputable developers
- Check recent update dates (abandoned plugins cause problems)
- Read reviews and support forum responses
- Avoid nulled (pirated) themes and plugins—they often contain malware
Monitor Performance Regularly
Don’t wait for problems to appear:
- Set up uptime monitoring (UptimeRobot, Pingdom)
- Monitor Core Web Vitals via Google Search Console
- Use Query Monitor periodically to check for slow queries
- Review error logs weekly
Implement Proper Caching
Caching reduces server load and prevents resource-related errors:
- Use a quality caching plugin (WP Rocket, W3 Total Cache)
- Configure caching correctly for your page builder
- Implement browser caching via .htaccess
- Consider server-level caching (Varnish, Redis)
Keep Your Database Clean
Database bloat slows your site and causes errors:
- Limit post revisions in wp-config.php:
define('WP_POST_REVISIONS', 5); - Clean transients regularly (WP-Optimize plugin)
- Remove unused tables from deleted plugins
- Optimize tables monthly
Choose Quality Hosting
Your hosting infrastructure matters more than you think:
- Ensure adequate PHP memory limits (256MB minimum)
- Use PHP 8.1+ for better performance and security
- Choose hosting optimized for WordPress
- Don’t outgrow your hosting plan—upgrade as your traffic grows
When to Call in Professional Help
Some situations require professional WordPress developers:
You Should Hire Help When:
- Your site is completely down and you can’t access anything
- You’ve tried the debugging steps above and still can’t identify the problem
- You need custom code modifications to fix theme or plugin issues
- You’re dealing with a hacked site and malware removal
- Database corruption is severe and repair tools don’t work
- You need to migrate to a new server or hosting provider
- Time is critical and debugging would take you hours/days
What to Provide Your Developer:
When you do hire help, give them:
- Complete description of the problem and when it started
- Access credentials (WordPress admin, FTP/SSH, hosting control panel)
- Debug log file contents
- List of recent changes (updates, new plugins, etc.)
- Any error messages or screenshots
- Your debug.log file
The more information you provide upfront, the faster and cheaper the fix will be.
Emergency Debugging: When Your Site Is Completely Down
If your entire site is down and you can’t access the WordPress admin:
1. Check If Your Host Is Down
Visit downforeveryoneorjustme.com and enter your domain. If the site is down for everyone, it might be a hosting issue. Contact your host immediately.
2. Access via FTP/cPanel
You can fix most issues without WordPress admin access:
- Enable WP_DEBUG via wp-config.php
- Rename the plugins folder to disable all plugins
- Switch themes by renaming your active theme folder
- Replace core WordPress files with fresh downloads
- Restore from backup
3. Check Your Domain and DNS
Sometimes the problem isn’t WordPress at all:
- Verify your domain hasn’t expired
- Check DNS settings in your domain registrar
- Ensure nameservers point to your hosting
4. Restore from Backup
If all else fails and you have a recent backup:
- Restore your database from backup
- Restore your files from backup
- Test thoroughly
This is why regular backups are non-negotiable.
Debugging Best Practices: Professional Tips
Always Work on a Staging Site First
Never debug or test fixes on your live site. Use:
- Your hosting provider’s staging environment
- Local development tools (LocalWP, XAMPP)
- A subdomain copy of your site
Document Everything
Keep notes on:
- What you tried
- What worked and what didn’t
- How you fixed previous issues
- Configuration changes you made
This documentation saves hours when similar problems arise.
One Change at a Time
When testing fixes:
- Make one change at a time
- Test thoroughly after each change
- Don’t assume you’ve found the fix until you’ve verified it
Multiple simultaneous changes make it impossible to know what actually worked.
Clear All Caches
After making changes, clear:
- WordPress object cache
- Plugin caches (WP Rocket, W3 Total Cache, etc.)
- Server cache (if applicable)
- CDN cache (Cloudflare, etc.)
- Browser cache
Cached versions can make you think a fix didn’t work when it actually did.
The Bottom Line: Debugging Is a Skill Worth Learning
WordPress debugging might seem intimidating at first, but it’s a systematic process. Follow the steps in this guide, work methodically, and document what you do. Most WordPress issues have predictable causes and straightforward solutions once you know where to look.
The investment in learning to debug pays off immediately:
- Less downtime means less lost revenue
- Faster problem resolution keeps visitors happy
- Understanding your site makes you a better owner/operator
- You’ll spend less on emergency developer fees
Remember: every WordPress expert started as a beginner who learned by troubleshooting their first white screen of death.


